
Remove Wire From the Z-Axis Limit Switch Box
Overview/Background Information
What Steps Have I Already Taken?
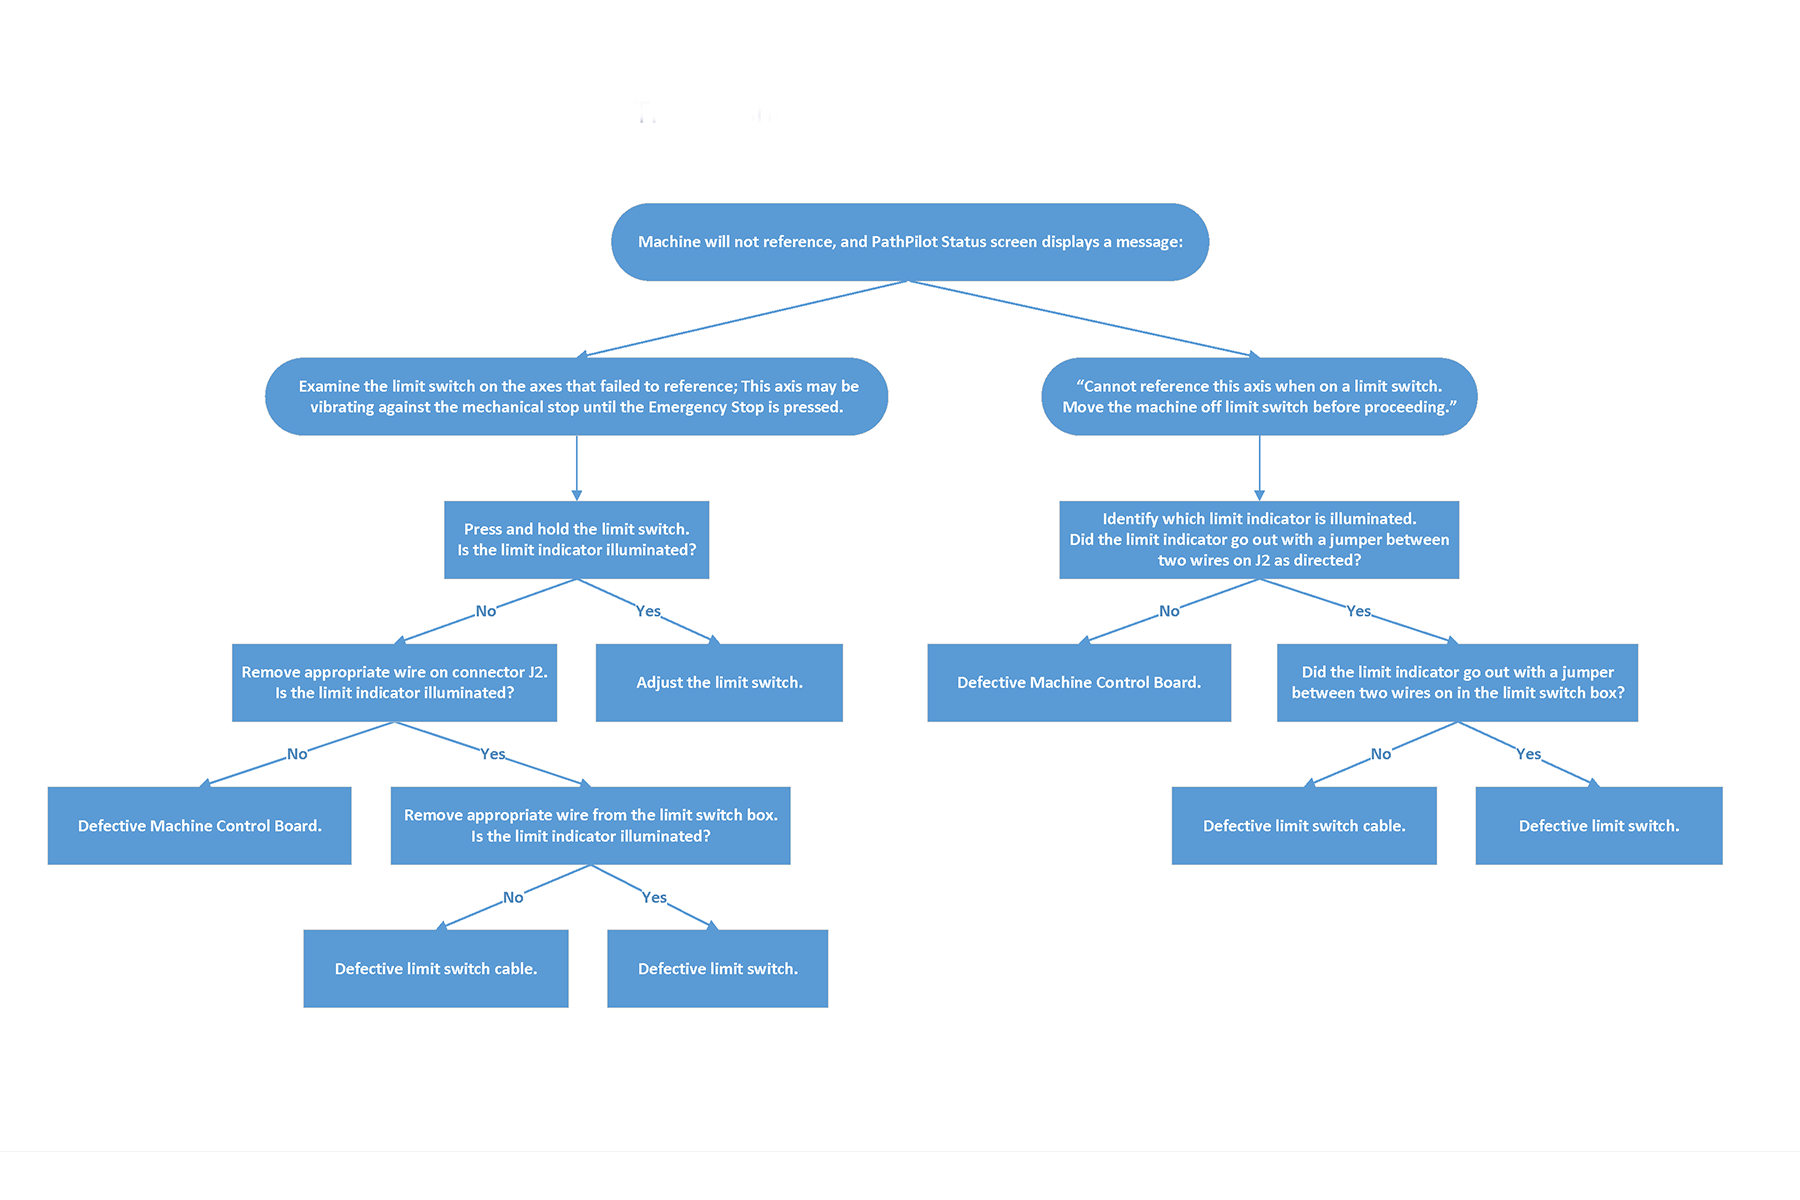
Before You Begin
If you haven't yet done so:
-
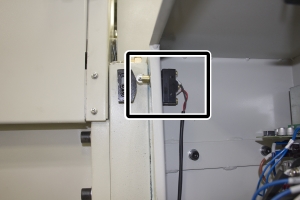
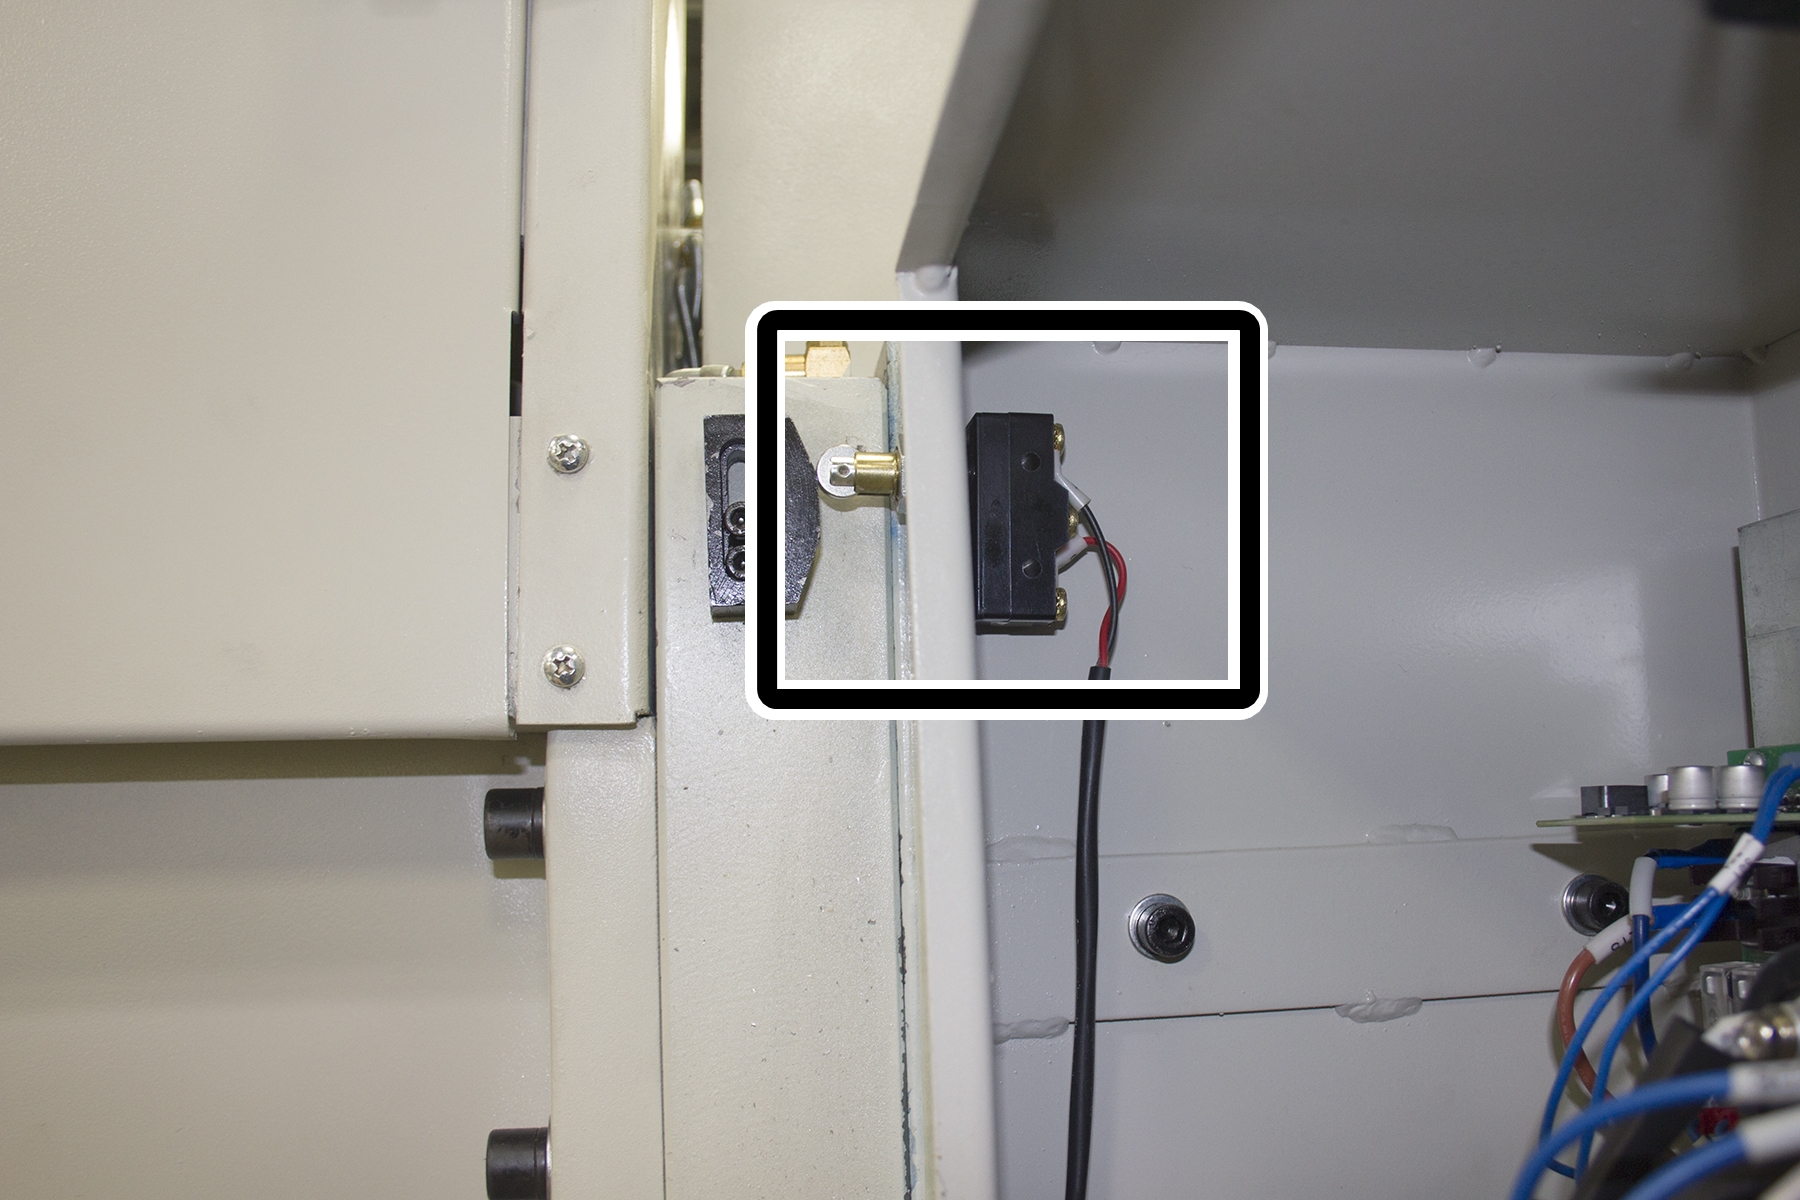
Open the electrical cabinet door.
WARNING! Electrocution Hazard: When servicing the machine from inside the electrical cabinet, always use caution. Points in the electrical cabinet have high voltages that can electrocute or shock you. Even after you've powered off the machine, electronic devices in the electrical cabinet may retain dangerous electrical voltages. Only qualified electrical machinery technicians should perform maintenance or troubleshooting procedures inside the electrical cabinet while power is still on.
-
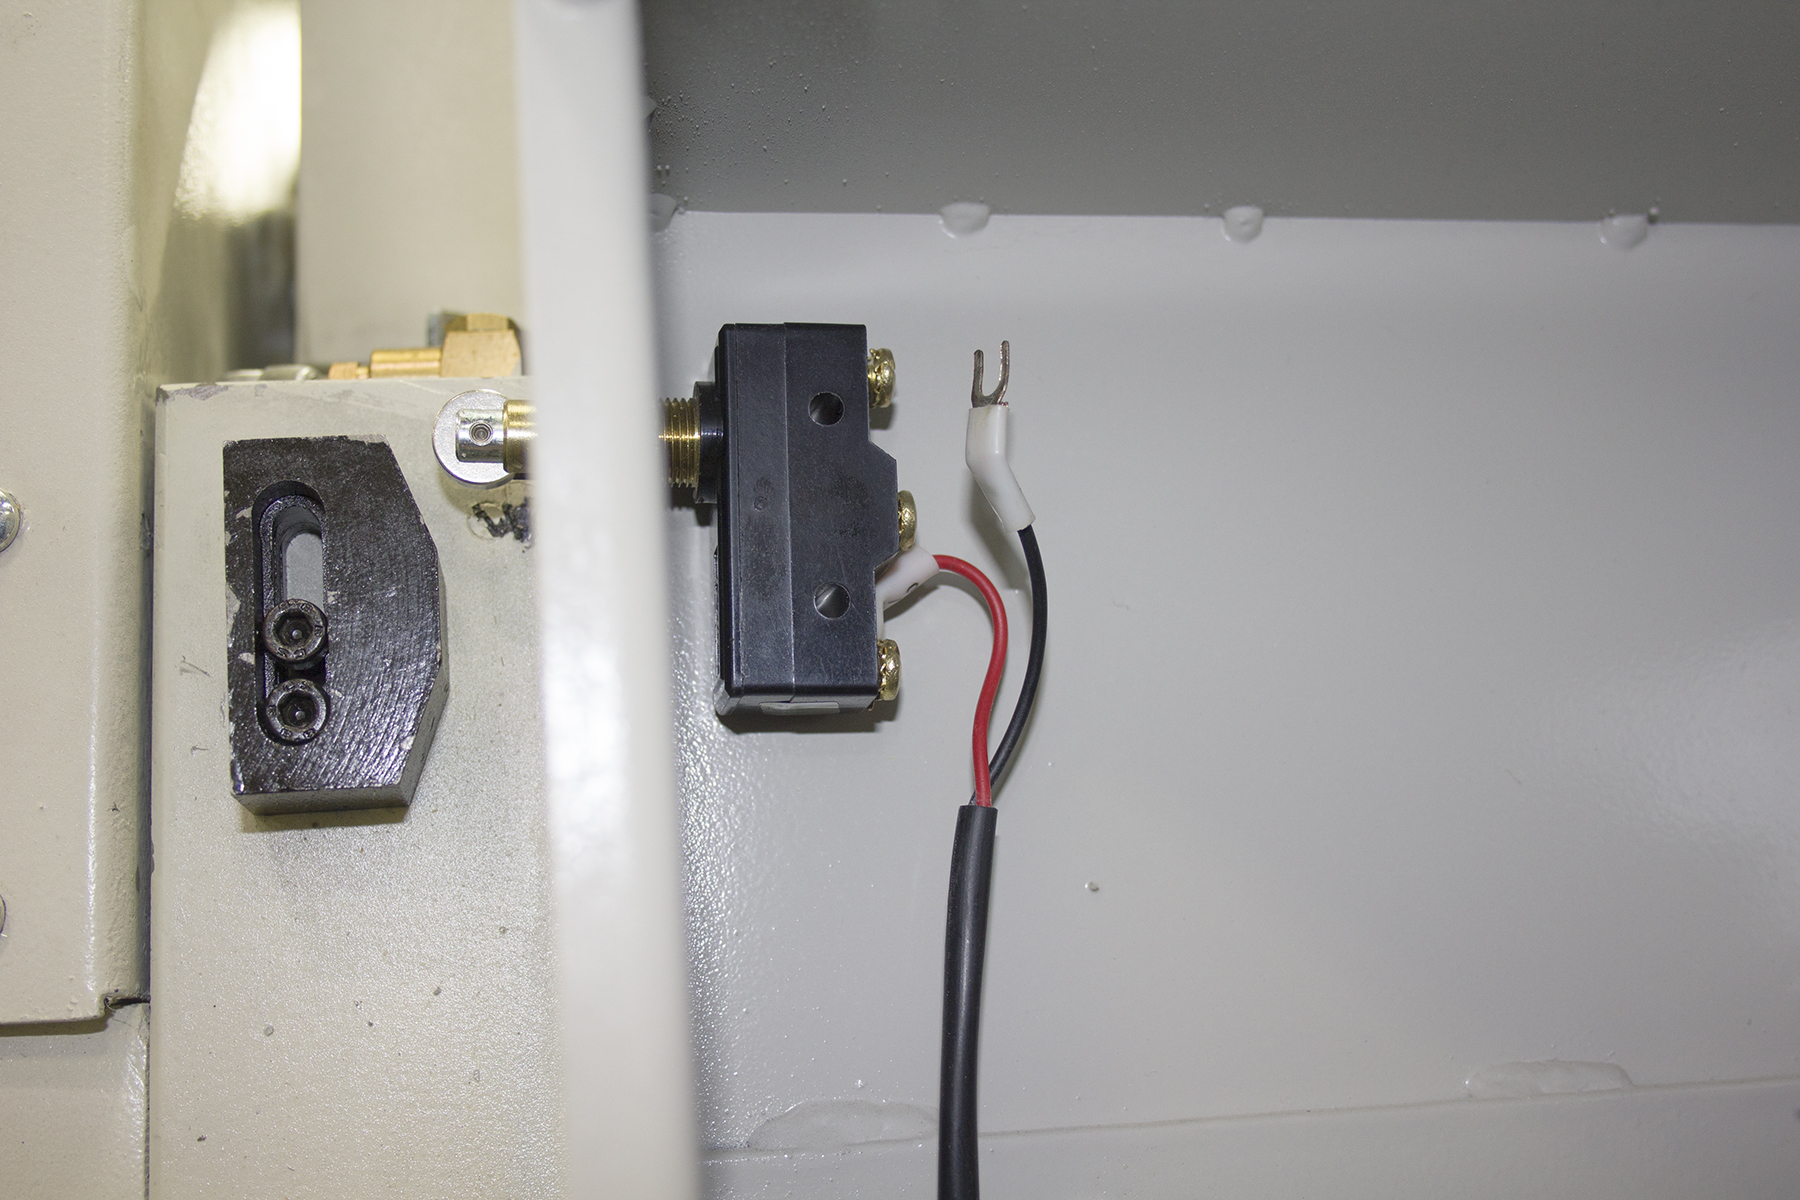
On the Z-axis limit switch, locate the two limit switch wires.
Troubleshooting Steps
-
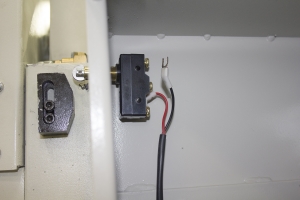
Remove one of the limit switch wires (it doesn't matter which one) and set it aside. Make sure the wire does not touch any metal or other wires on the limit switch.
-
From the PathPilot® interface, on the Status tab, locate the limit switch lights.
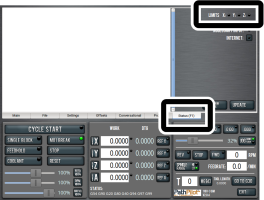
- Make note if the Z Limit light is on or off.
- Put the Z-axis wire back in the on the limit switch.
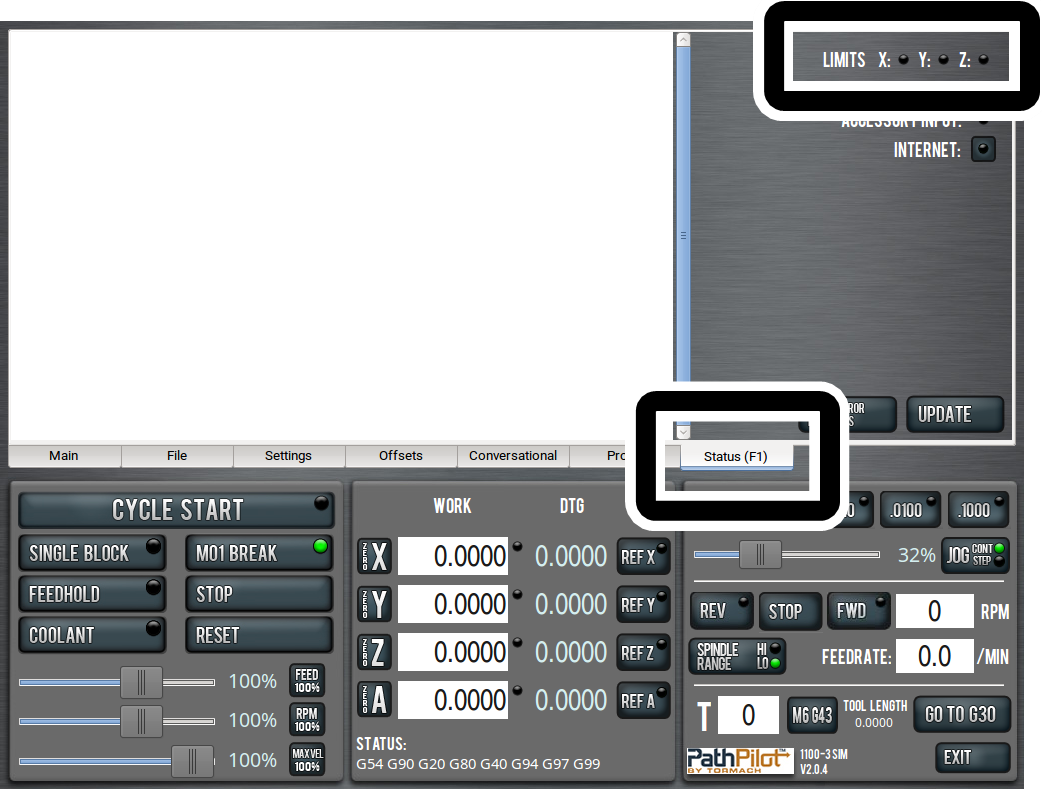
Is the Z Limit light on?
- Yes: This means that the Z-axis Limit Switch is defective and must be replaced. You may attempt to clean the limit switch using compressed air and WD-40® (or similar) and repeat the troubleshooting steps; go to Machine Won't Reference.
- No: This means that there may be a damaged cable. Tormach Technical Support for guidance on how to proceed.