
Measure the Voltage on the Main Disconnect Switch
Overview/Background Information
What Steps Have I Already Taken?
Before You Begin
If you haven't yet done so:
-
Power off the machine and the PathPilot® controller.
- Push in the Emergency Stop button on the operator
- From the PathPilot® interface, click Exit.
- Turn the Main Disconnect switch to Off on the side of the electrical cabinet.
- Remove the power plug(s) from the wall outlet. If your system is hardwired, isolate the machine by opening its circuit breaker(s).
-
Follow correct lockout/tagout procedures.
- Push in the Emergency Stop button on the operator
-
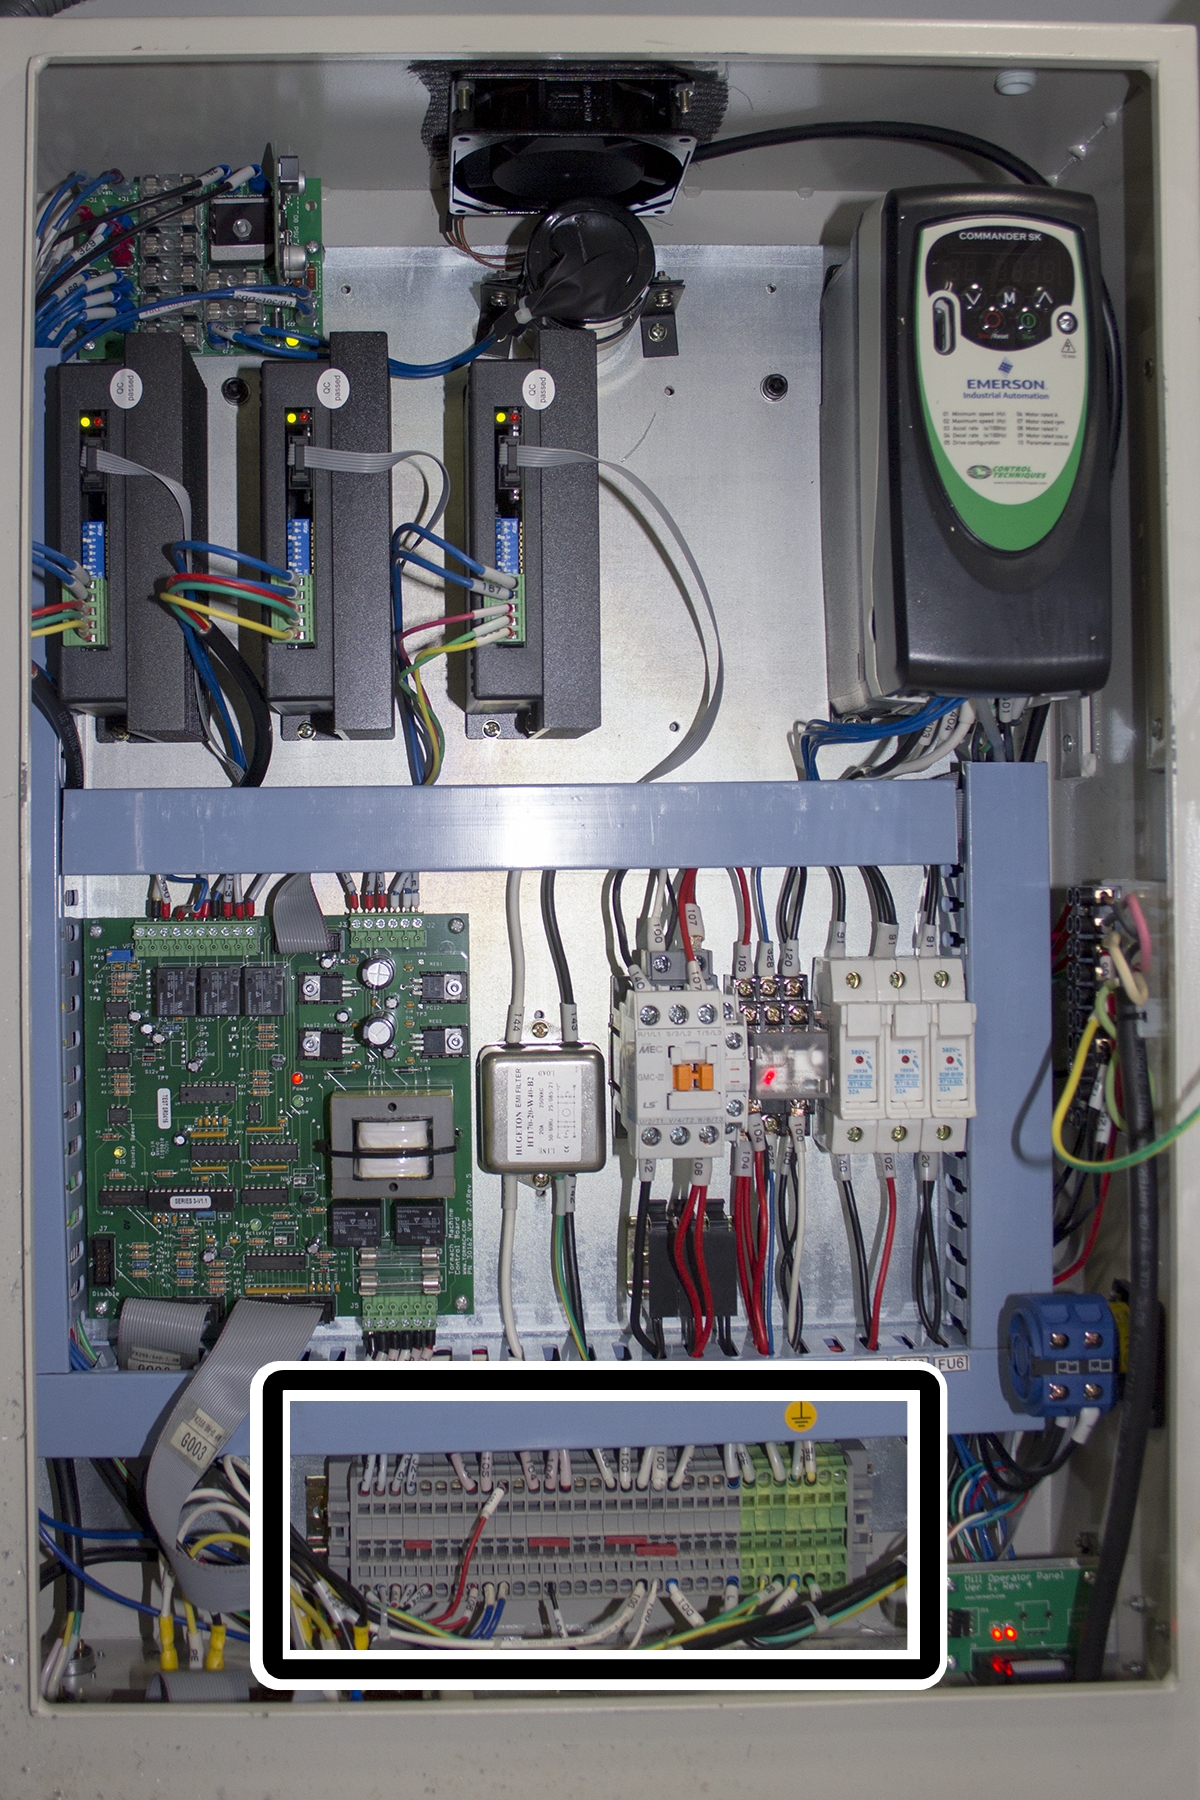
Open the electrical cabinet door.
WARNING! Electrocution Hazard: When servicing the machine from inside the electrical cabinet, always use caution. Points in the electrical cabinet have high voltages that can electrocute or shock you. Even after you've powered off the machine, electronic devices in the electrical cabinet may retain dangerous electrical voltages. Only qualified electrical machinery technicians should perform maintenance or troubleshooting procedures inside the electrical cabinet while power is still on.
-
Locate the main disconnect switch.
-
In the electrical cabinet, locate the terminal block.
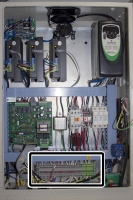
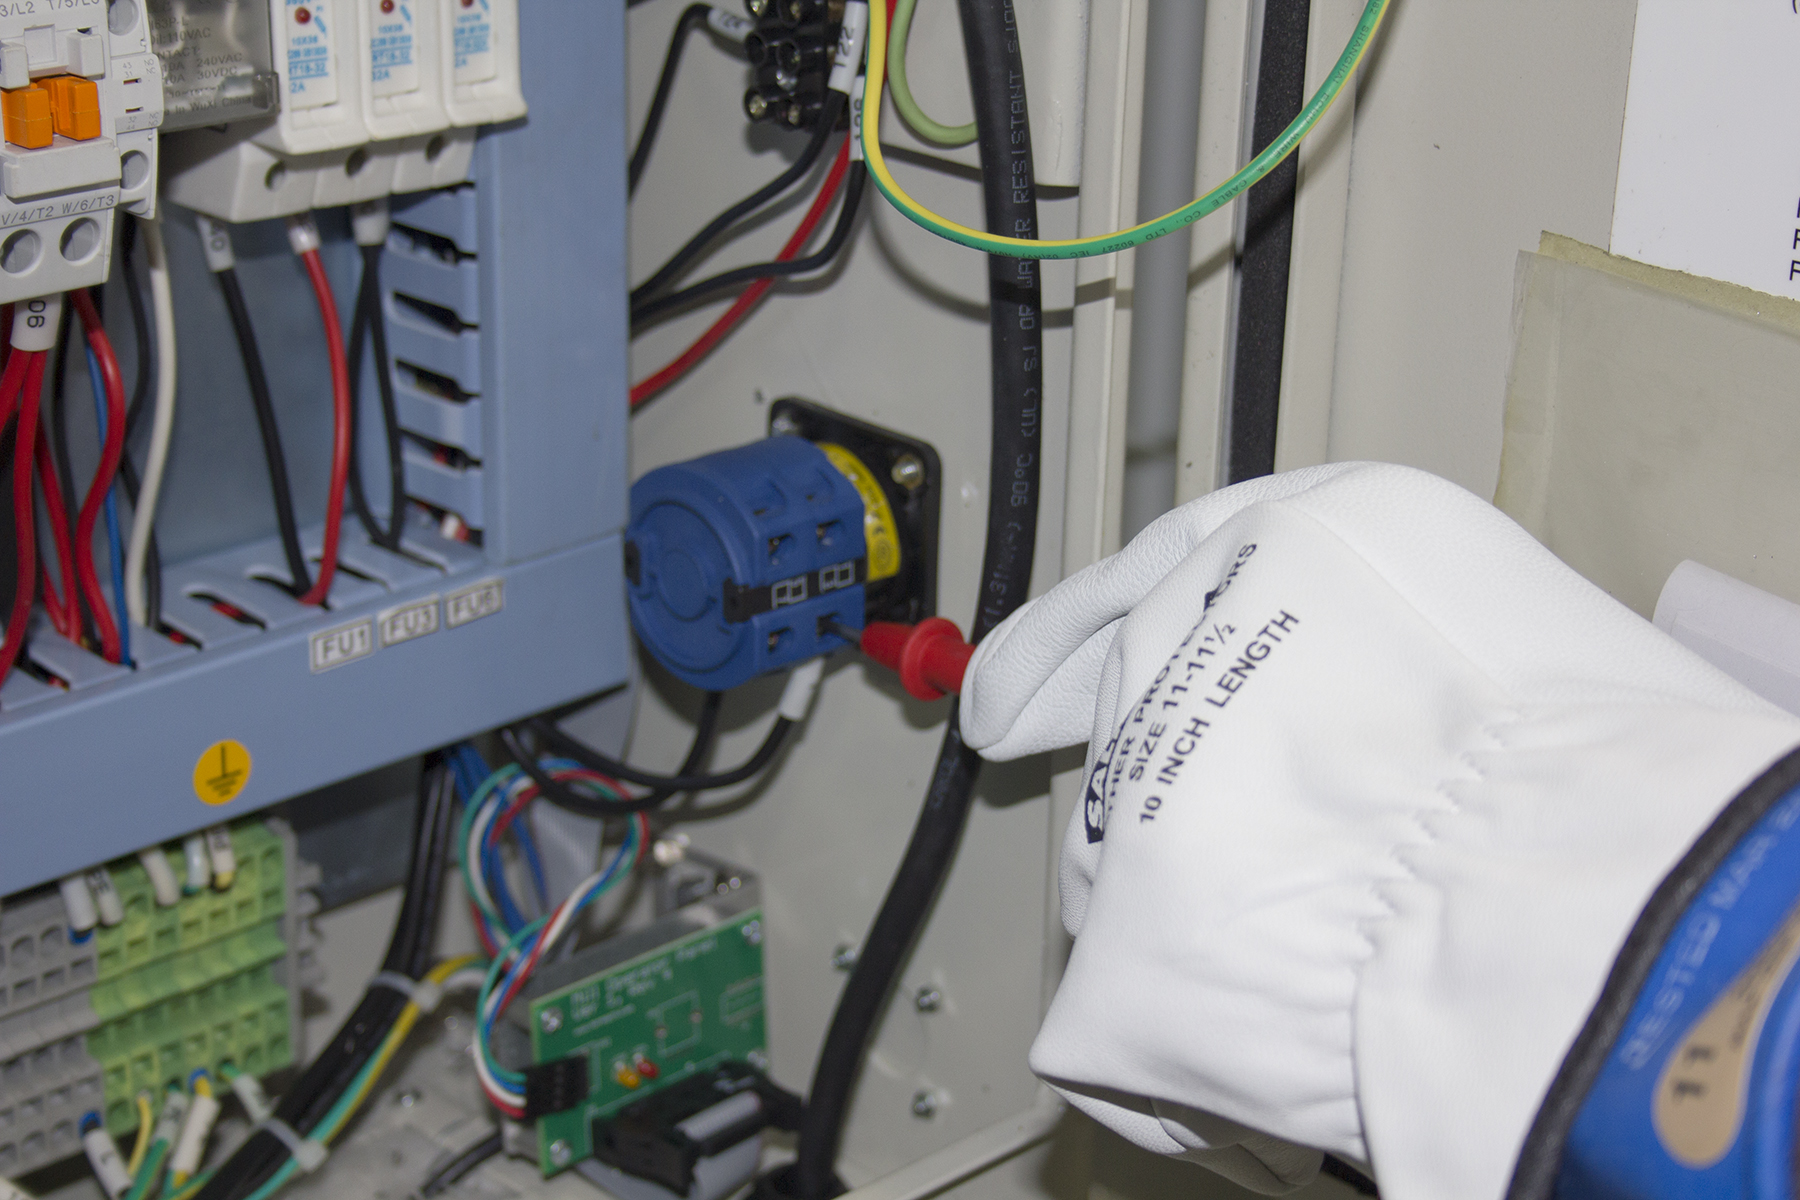
- Locate wire L on the main disconnect switch.
- Locate wire 100 on the terminal block.
-
Gently pull wires L and 100 away from the the main disconnect switch and the terminal block to see if they're properly connected. If they're not, connect them.
-
Power on the machine and the PathPilot® controller.
- Insert the power plug(s) into the wall outlet. If your system is hardwired, restore power to the circuit breaker(s).
- Turn the Main Disconnect switch to ON on the right side of the electrical cabinet.
- Twist out the Emergency Stop button on the operator
- Press the Start button on the operator
- Bring the machine out of reset and reference it.
Troubleshooting Steps
- Locate wire L on the main disconnect switch.
- Locate wire 100 on the terminal block.
-
Set the multimeter to AC Volts mode.
-
If the multimeter does not auto-range, make sure the range is set to 0-250V.
WARNING! Electrical Shock Hazard: Points in the electrical cabinet have high voltages that can electrocute or shock you. To prevent injury, you must wear insulating gloves and long sleeves to protect yourself from electrical shocks.
-
Put the red lead of the multimeter on wire L.

-
Put the black lead of the multimeter on wire 100.
- Read the AC voltage that displays. The value should be 100 to 150 Vac.
Does a value of 100 to 150 Vac display on the multimeter?
- Yes: Go to Measure the Voltage on Wires 100 and 102.
- No: This means that the machine is not receiving proper voltage. Make sure that:
- The circuit breakers are in the on position
- The machine is properly plugged in to an outlet
- The outlet has sufficient voltage
Write down the value displayed on the multimeter. Tormach Technical Support for guidance on how to proceed.