
Examine the Position of the Machine Axes
Overview/Background Information
What Steps Have I Already Taken?
Before You Begin
If you haven't yet done so:
-
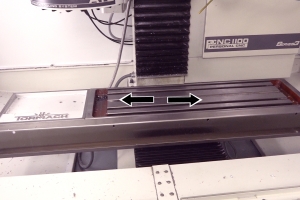
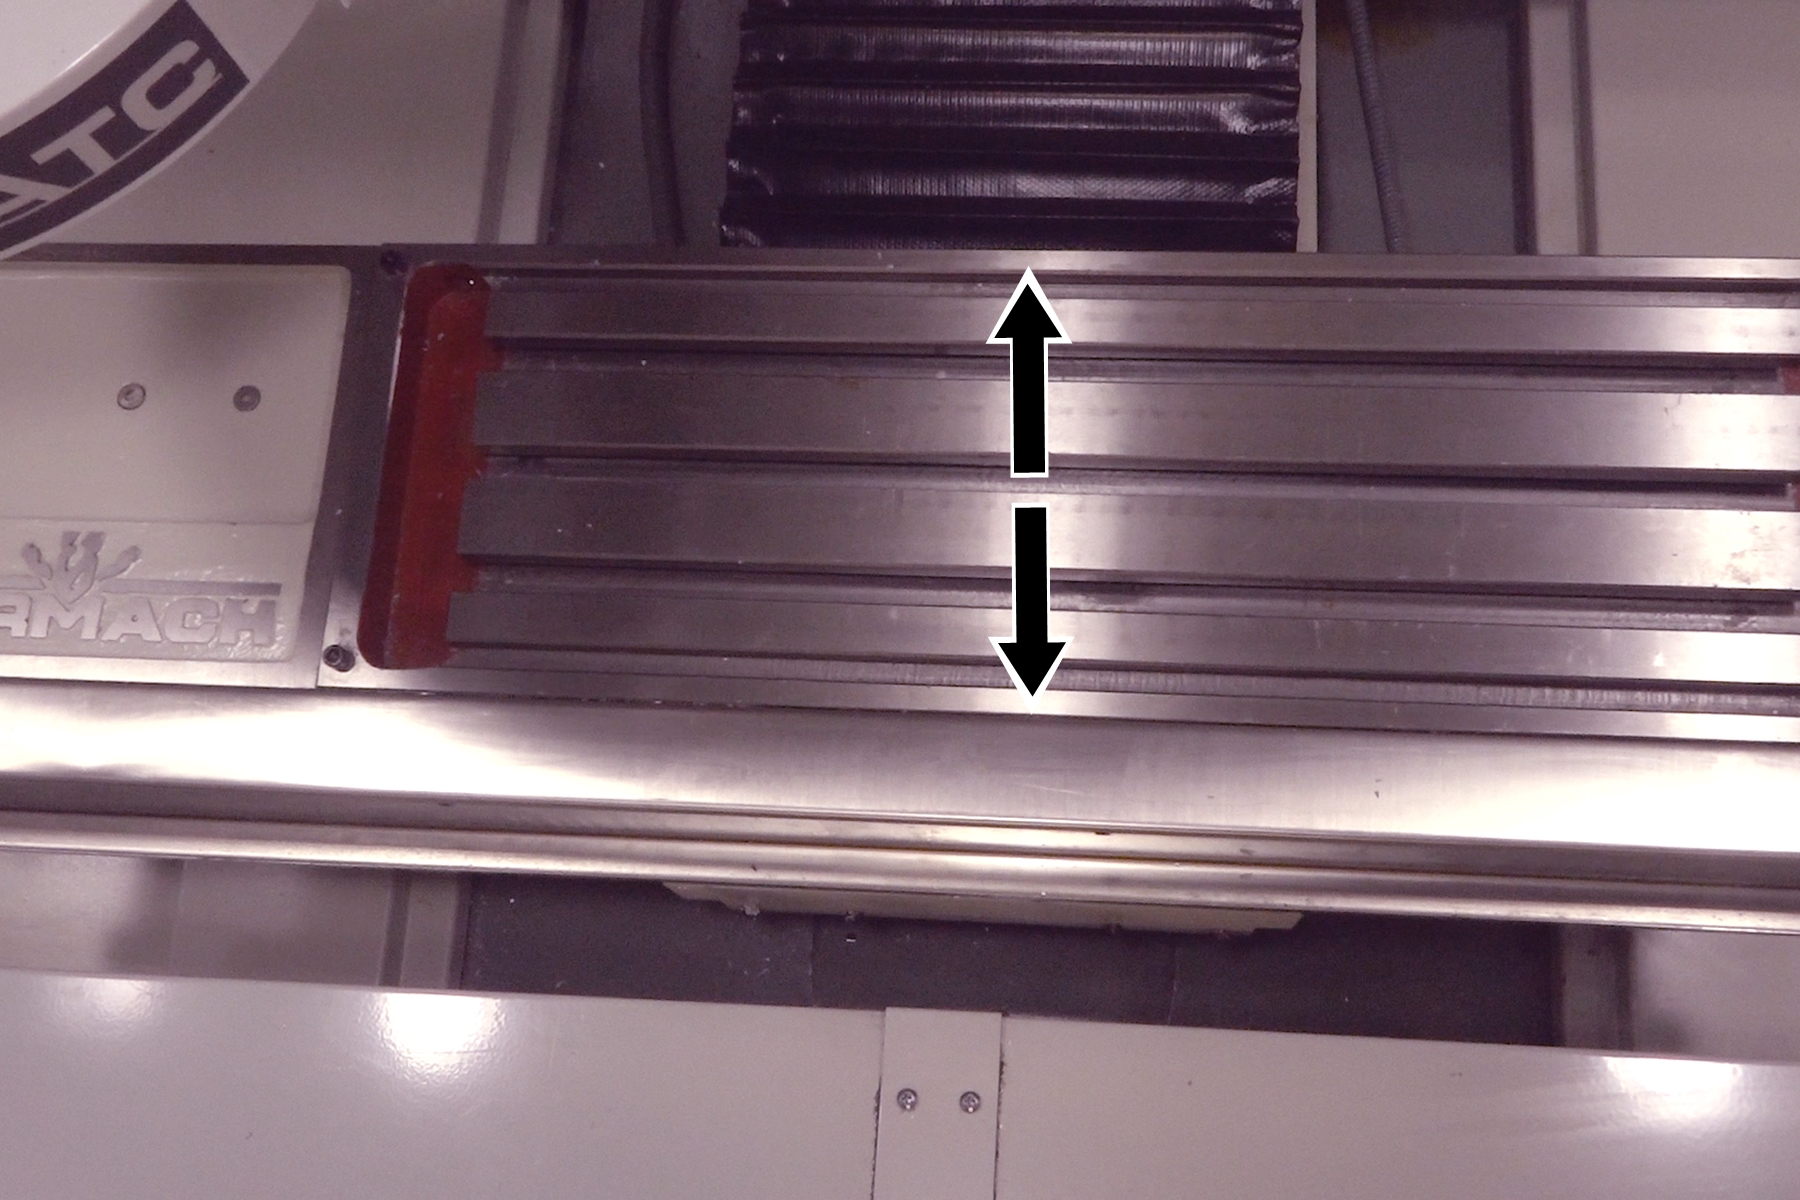
While looking at the front of the machine, examine the position of the machine table on the X-axis to determine if the machine is on or near a limit switch. The machine could be on or near a limit switch if the machine table is moved all the way to the right.
-
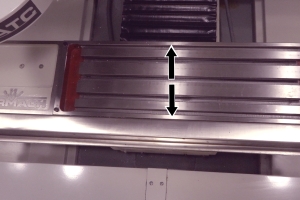
While looking at the front of the machine, examine the position of the machine table on the Y-axis to determine if the machine is on or near a limit switch. The machine could be on or near a limit switch if the machine table is moved all the way forward.
-
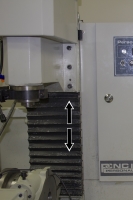
While looking at the front of the machine, examine the position of the machine table on the Z-axis to determine if the machine is on or near a limit switch. The machine could be on or near a limit switch if the spindle is moved all the way up.


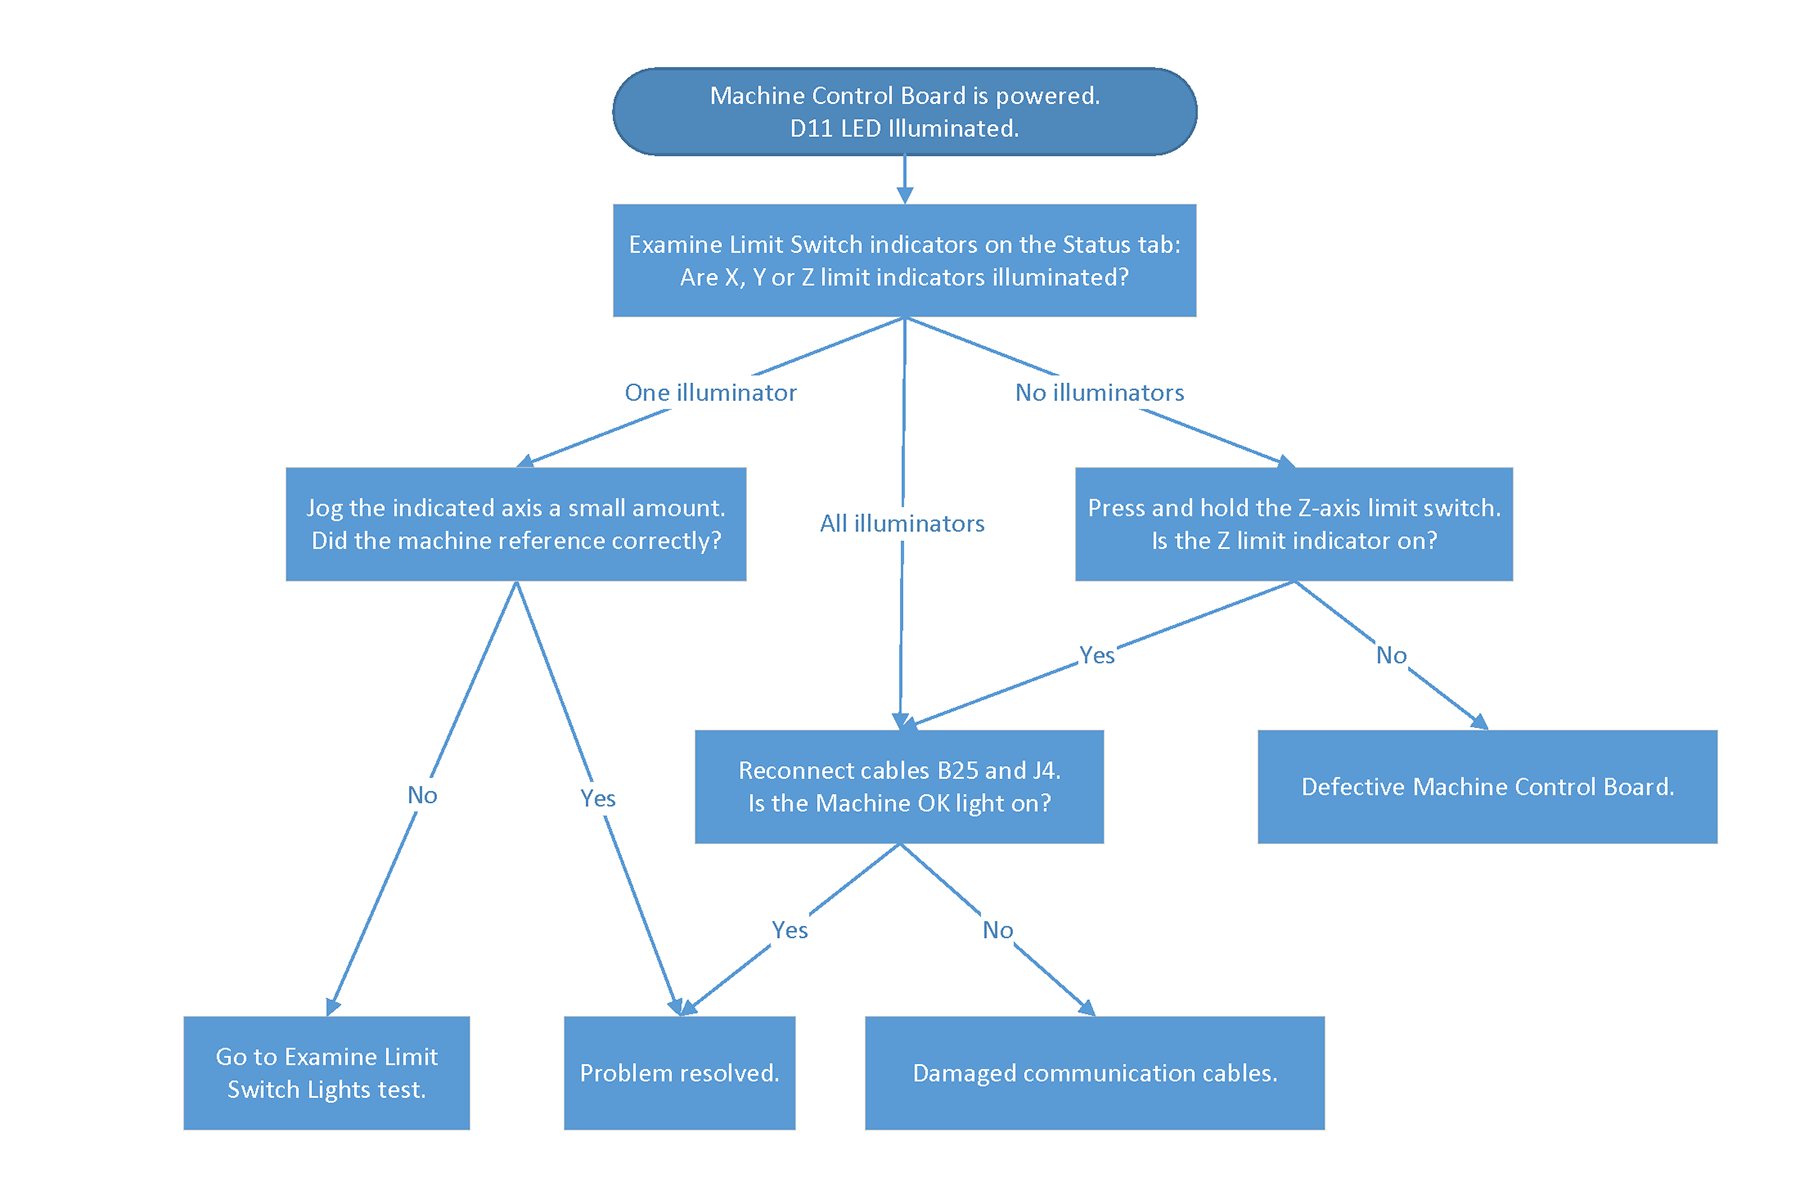
Troubleshooting Steps
-
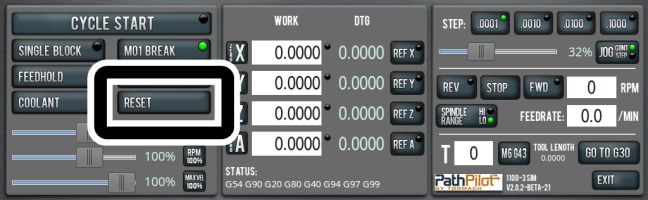
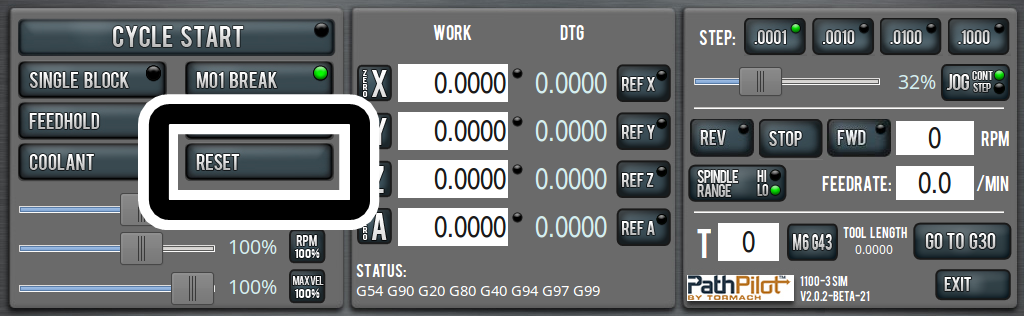
From the PathPilot® interface, on the Main tab, click Reset.
- Jog the machine a small amount left (-X) and right (+X), forward (-Y), and down (-Z).
-
Repeat Steps 1 and 2 until the axes are moved off of the limit switches and the machine does not go into reset mode.
NOTE: If one axis is on a limit switch, the machine goes into reset mode once you stop jogging. You may need to repeat the Troubleshooting Steps until all axes are off the limit switches.
- Examine the Reset button to verify that it isn't flashing. A flashing Reset button indicates that the machine is in reset mode.
- Click REF Z, REF X, and REF Y.
Did the machine reference all axes correctly?
- Yes: You've successfully solved the problem! Close out of this troubleshooting guide and go make some chips.
- No: This means that problem is related to the machine's limit switches. Go to Examine Limit Switch Lights.